You need a photo at 800×800 for a product listing, or under 1920px wide for a blog post, and you want it done in the next 20 seconds without creating an account or wondering where the original file just went. Most "resize image" search results answer that with an upload form. This one doesn't have to.
What Actually Happens When You Resize an Image
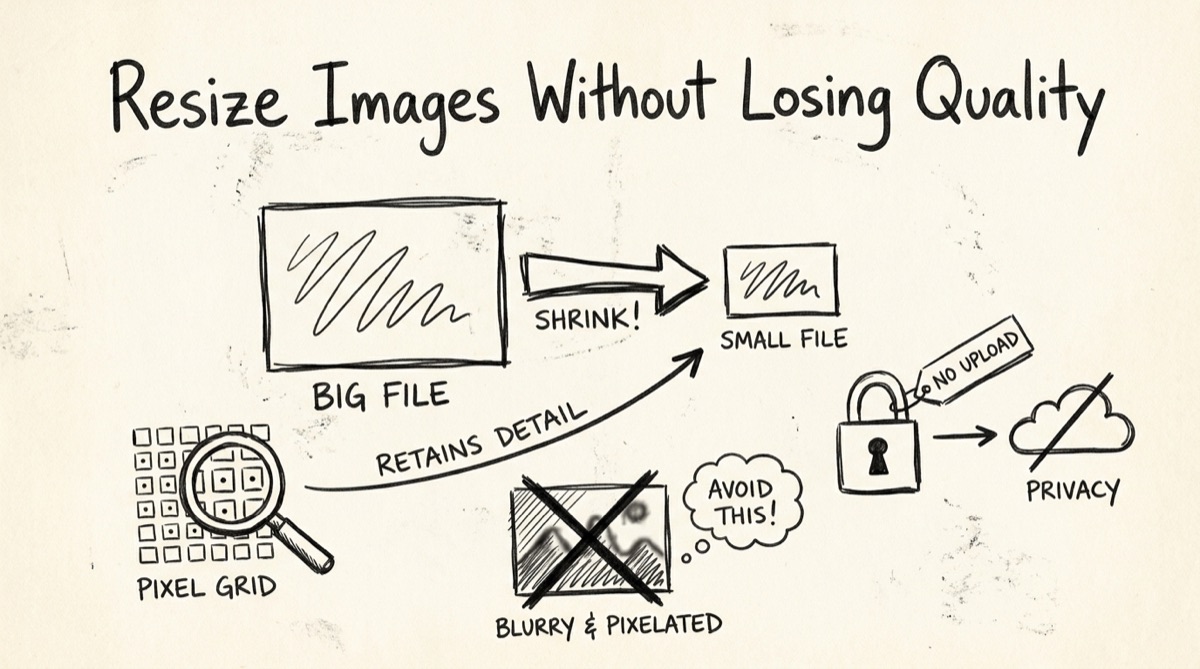
A raster image is a grid of pixels. Resizing means generating a new grid at a different pixel count, which means the software has to invent or discard pixel values — there's no way around that.
Downscaling (making it smaller) throws away information you don't need. Going from 4000×3000 to 1200×900 averages nearby pixels down into fewer of them. This is close to lossless perceptually — a well-implemented resize (bilinear, bicubic, or Lanczos resampling) at a smaller size looks sharp because you're discarding detail the display couldn't show anyway. The visible quality hit comes later, when the resized image is re-encoded: a JPEG saved at low quality after resizing will show compression artifacts that have nothing to do with the resize step itself.
Upscaling (making it bigger) is the opposite problem. There is no extra detail to reveal — the software is interpolating, essentially guessing pixel values between the ones that exist. A basic resize (the kind every browser's <canvas> API does natively) will make an upscaled image look soft or blurry, because it is mathematically blending existing pixels, not synthesizing new detail. If you need to genuinely enlarge a low-res image and keep it sharp, you need an AI upscaler (diffusion or GAN-based), not a resize tool — resizing and upscaling-with-detail-synthesis are different problems even though they output the same kind of file.
EXIF and metadata are the quiet casualty of most resize tools, including browser-based ones. EXIF data — camera model, GPS coordinates, capture timestamp, color profile — lives in a separate part of the file structure from the pixel grid. When an image is drawn onto an HTML canvas and re-exported, only the pixels survive; the canvas has no concept of metadata, so it gets dropped in the process. For most people this is a feature, not a bug — you probably don't want to publish a photo with embedded GPS coordinates on a blog. But if you're relying on capture date or camera info downstream (batch organizing a photo library, say), resizing through canvas will lose it. Orientation is the one exception: modern browsers auto-rotate the image to match its EXIF orientation flag before it ever reaches the canvas, so a sideways phone photo won't come out sideways — only the metadata fields disappear, not the visual orientation.
File format on the way out matters more than people expect. Resizing doesn't have to mean recompressing, but most tools recompress anyway as part of writing the output. A tool that always re-encodes to PNG, for instance, is lossless on the pixel data but will produce a noticeably larger file than a JPEG or WebP for a photograph — PNG is built for flat-color and line art, not gradients and photo noise. Know what format a resizer hands back before you build a workflow around it.
How to Resize an Image (Without Uploading It)
orangebot.ai/tools/image-resizer runs the resize entirely on <canvas> in your browser tab. The file is read locally, drawn to an in-memory canvas at the new dimensions, and exported back out — it never touches a server, which you can confirm yourself by opening DevTools → Network, turning off Wi-Fi, and resizing anyway.
- Drop the image in. Drag a JPEG, PNG, WebP, GIF, or BMP onto the drop zone, or click to browse. The tool reads its natural width and height immediately.
- Pick a percentage preset, or type exact dimensions. The presets (25%, 50%, 75%, 150%, 200%) cover the common "cut it in half" or "scale it up" cases in one click. For a specific target — say a marketplace listing that requires exactly 1200×1200 — type the width and height directly.
- Leave the aspect-ratio lock on unless you want to stretch it. The padlock icon next to the width/height fields is on by default: type a new width and the height recalculates automatically to keep the original proportions. Click the lock icon to unlock it if you deliberately want to squash or stretch the image to an exact box (useful for banner ad slots with fixed non-proportional dimensions).
- Click Resize Image. The tool draws the new canvas and shows a side-by-side preview — original next to resized, with both dimensions and file sizes labeled — so you can sanity-check before downloading.
- Download. The output saves as a PNG, with the new dimensions baked into the filename (
photo-1200x900.png), so you're not stuck guessing which file is which in your Downloads folder later.
One honest limitation worth knowing up front: the tool works on one image at a time and always exports PNG, regardless of what you dropped in. If you fed it a JPEG and want a JPEG back, or you need to resize fifty files in one pass, this isn't the tool for that job — see the comparison below for where those cases are better served.
Resize Tools Compared
There's no single best image resizer — it depends on whether you're doing a one-off resize, a recurring batch job, or something that needs to stay off a server entirely.
| Tool | Runs where | Batch | Output formats | Cost |
|---|---|---|---|---|
| orangebot.ai/tools/image-resizer | 100% in-browser (canvas) | No — one image at a time | PNG only | Free |
| Squoosh | 100% in-browser (WebAssembly) | No | JPEG, PNG, WebP, AVIF | Free |
| Bulk Resize Photos | Uploads to their server | Yes | JPEG, PNG | Free |
| Adobe Express | Uploads to their server | Limited (paid tiers) | JPEG, PNG | Free tier + paid |
| Canva | Uploads to their server | Yes (paid) | JPEG, PNG, PDF, more | Free tier + paid |
If the file never leaving your device is the priority — a client photo, an unreleased product shot, anything you'd rather not hand to a third-party server — orangebot's resizer and Squoosh are the two client-side options, and Squoosh has the edge if you also need format conversion or finer compression control alongside the resize. If you're resizing one or two images for a blog post or a marketplace listing and don't want to think about accounts, orangebot's tool does that faster because there's nothing to configure beyond width and height.
If you're processing a folder of fifty product photos to a standard size, none of the client-side tools above will save you time — you want a batch tool, and that means either Bulk Resize Photos (accepts the upload trade-off) or a local script (ImageMagick's mogrify -resize 1200x1200 handles a folder in one command, no upload, no browser memory limit). For anyone doing this weekly, that CLI command is worth the five minutes it takes to install ImageMagick once.
We wrote a fuller breakdown of the free-vs-paid trade-off, including where the line actually sits for compression tools specifically, in Free vs Paid Image Compressors: When to Pay — the same server-vs-browser logic applies to resizing.
FAQ
Does resizing an image reduce its file size?
Usually, yes, but not because of "compression" — a smaller pixel grid is simply less data. A 4000×3000 photo resized to 1200×900 will produce a much smaller file even with no compression settings touched, because there are fewer pixels to encode. If you need the file size down without changing the dimensions, that's compression, not resizing — see orangebot.ai/tools/image-compressor for that instead.
Will resizing make my image blurry?
Downscaling shouldn't — going smaller is close to lossless for perceived sharpness. Upscaling will, because the tool is interpolating pixels that don't exist rather than recovering real detail. If you're scaling above 100% and the result looks soft, that's expected behavior for canvas-based resizing, not a bug.
Does the resizer keep my image's EXIF data?
No. Any tool that resizes through an HTML canvas — including this one — strips EXIF metadata (camera model, GPS, capture date) as a side effect of redrawing the pixels. Visual orientation is preserved because the browser applies the EXIF rotation flag before drawing, but the metadata fields themselves don't survive the round trip. If you need to keep EXIF intact, you'll need a tool that edits the file container directly rather than re-rendering pixels (e.g., ImageMagick with -resize and no format change preserves more metadata than a browser canvas will).
Can I resize a whole folder of images at once with this tool?
Not with orangebot's image resizer — it handles one image per pass. For batch resizing without uploading, script it locally with ImageMagick (mogrify -resize 1200x1200 *.jpg). For batch resizing without a script, Bulk Resize Photos or Canva's bulk resize (paid tier) both accept the upload trade-off in exchange for handling a whole folder.
What image formats can I resize?
The tool accepts anything a browser can decode as an image — JPEG, PNG, WebP, GIF, BMP are the common ones. The output is always PNG, so if you need to resize and keep the original format (say, a JPEG in, JPEG out), use Squoosh instead, which lets you pick the output codec.
Is this actually private, or does "runs in your browser" just mean the UI is client-side?
The resize computation — reading the file, drawing it to canvas, exporting the blob — happens entirely in JavaScript running in your tab. No network request carries the image data anywhere. You can verify this yourself: open your browser's DevTools, go to the Network tab, disconnect from the internet, and resize an image. It'll work exactly the same, because there was never a server involved.
Resizing is one of a handful of everyday image tasks — alongside compressing, converting formats, and cropping — where "upload it to a website" is a habit more than a requirement. Browsers have been able to do pixel manipulation locally for over a decade; most tools just haven't caught up. The full set of privacy-first, no-signup browser tools — image, PDF, audio, and more — is at orangebot.ai/tools.